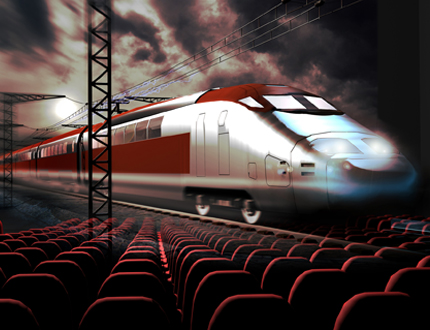
The Stereoscopic Wave
Think stereoscopic or 3D video presentations and you may conjure up memories of Viewmaster slides from your childhood, or images of 1950s-era movie audiences wearing cardboard 3D glasses. But 3D has entered a new generation, with a new era of technology that’s filtered down from movie theaters to the consumer level. But creating 3D stereoscopic videos doesn’t require the budget of a Hollywood blockbuster. New cameras and gear have made it a pretty easy prospect for the hobbyist to create and show stereoscopic 3D videos.
It Starts With the Camera
If you’re ready to get into 3D video, the best way to start is purchase a dedicated stereoscopic video camera. Stereoscopic video cameras pretty much take two different forms. Cameras with a pair of lenses separated enough to capture simultaneous separate images, or rigs that hold two cameras in place to achieve the same effect. GoPro’s Dual HERO system is a good example of the latter. At the simplest, there are even dual-lens adapters which will fit over your iPhone or Android and let you shoot stereoscopic images.
With either of these camera types you’re ready to start recording the raw footage you need to create your stereoscopic video. Keep in mind that some 3D cameras and systems let you adjust the parallax setting – basically how far apart each lens is from each other. By adjusting parallax you can decrease or intensify the stereoscopic effect. As a rule of thumb, the wider the parallax setting, the more dramatic the effect. So if you’re looking for a dramatic effect, go for wider parallax settings.
Content Is King – Getting the Shots You Want
Composition of your shots when shooting in 3D is just as, if not more, important than it is when shooting regular 2D video. It’s tempting to think that everything you shoot will “pop” as a stereoscopic image. But that’s not always the case. To achieve the best results you’ll need to consider how objects are arranged on three distinct planes: foreground, mid-background, and far-background.
The foreground consists of the objects closest to you when shooting. Objects in the foreground can provide some of the most startling effects. Think about some of the more clichéd 3D tropes, for example – a snake striking towards you, or the hero of the movie lunging forward with a sword. These are foreground elements. These objects should be placed in the center of your composition, drawing attention to them.
Mid-background elements add context to what’s in the foreground. They provide the sense of scale and motion to the objects in the foreground. Think of our sword example, for instance. Our eye reads the change of scale and motion of the sword more effectively because the hero, our mid-background element, is either stationary or doesn’t move as much towards us.
The far-background elements of our composition add another layer of realism and detail to your stereoscopic video. This is particularly true when we have all three elements in a scene. Because of the distance away from the camera, far-background images remain essentially motionless, thus providing another visual reference for our eyes and brain to process.
Without all of these elements, our stereoscopic videos can be underwhelming. If you shoot a city skyline, for example, all the elements are far-background, so without motion near the camera the effect is flat, and lacking any stereoscopic pop. Conversely objects that are all in the foreground can appear somewhat detached without mid- and far-background element – somewhat like cut out figures pasted on paper. So remember – to make your video interesting, look for compositions that have many discreet elements in them.
Editing Your Content – Get the Right Tools
Now that you’ve got your footage you’ll make it shine by editing. Don’t fall back on the idea that the novelty of stereoscopic 3D footage will make for a compelling video all by itself. As with any video, remember that story is at the heart of what you’re doing.
Many 3D cameras come with some basic editing software, but you’ll get the best results by working with more advanced programs. Some of the top line programs, like Adobe’s Premiere Pro, may require some special plug-ins to allow for 3D editing and rendering. In some cases you may find quirks in some aspects of the editing process, for example, in placing text elements or menus. Peruse the many excellent online forums before you make a decision as to what editing software platform you want to employ.
Get Your Audience – Platforms for Sharing Your Work
Now that you’ve created your stereoscopic magnum opus, you’ll want to share it with others. Probably one of the simplest ways to do this is online. YouTube’s dedicated stereoscopic 3D channel lets anyone with a simple pair of cardboard red-blue-lens glasses watch the results. Just upload your 3D video in a split-frame format. YouTube will let viewers switch to the appropriate mode for use with 3D glasses.
Experiment!
As we’ve seen there’s a lot of opportunity to create, edit, and share stereoscopic videos. And many of these techniques are pretty simple and easy to employ. The keys for creating effective stereoscopic 3D videos are the same as it is for creating any video. Remember the fundamentals of what you’re shooting, how you’re going to compose your shots, and most of all consider the story you’re trying to tell with your video. Remember those fundamentals and you’ll always have a product you can be proud of.
– Video Caddy
Video Caddy